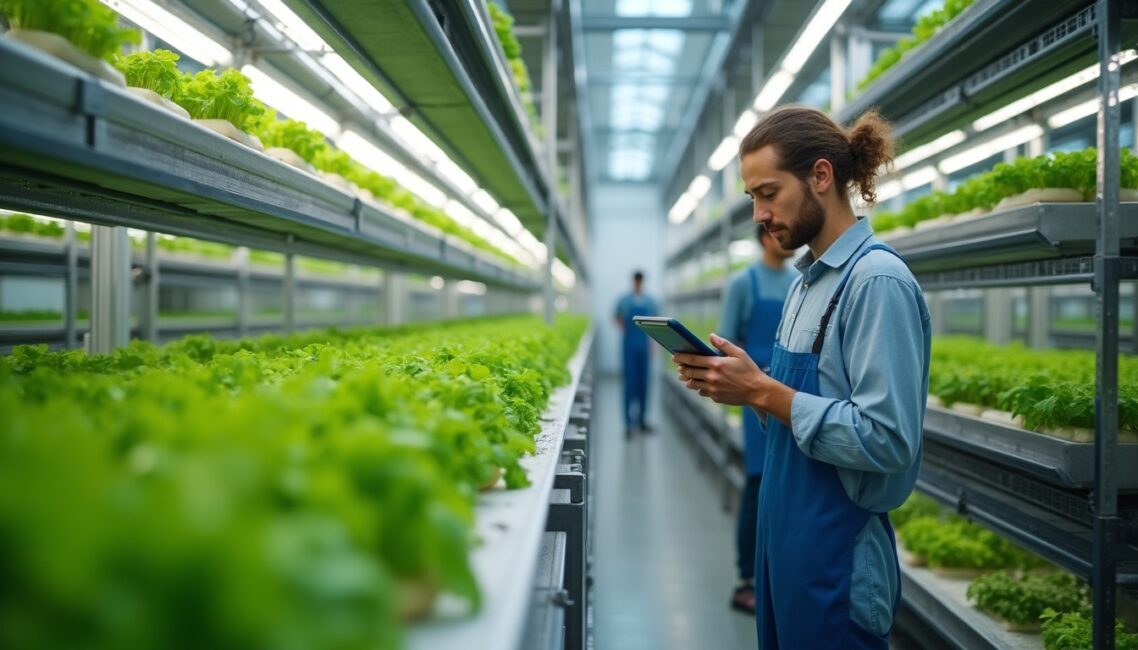
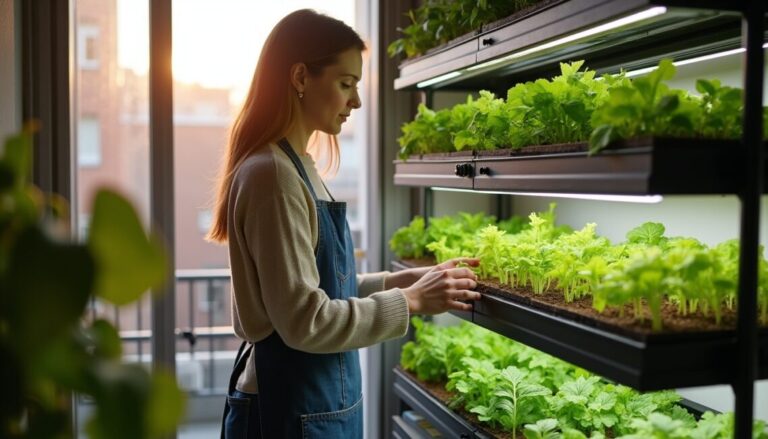
Vertical farming is an intensive method of growing crops in stacked layers, often indoors, that increases yield per square foot and reduces resource use. It matters because urbanization, climate risk, and supply-chain challenges demand higher, local food production—vertical farming provides a scalable solution. To start, evaluate space, light, irrigation, and crop choice, then pick a simple rack-and-shelf layout to shorten time-to-harvest.
Many growers face choices about shelving, lighting, irrigation, and climate control that impact cost, complexity, and crop speed. This guide compares shelving vs racks, LED spectra, hydroponic and wick irrigation, and compact HVAC solutions to help newcomers reduce risk and accelerate yields using vertical farming setups.
Below you’ll find practical blueprints, fast-yielding crop picks, space-optimization tactics, starter equipment checklists, two comparison tables, and a FAQ to get your vertical farming project on track.
Shelving systems for vertical farming are typically lightweight, modular units designed to maximize vertical area. Choose corrosion-resistant steel or aluminum for durability and adjustable shelf heights to fit seedlings and mature plants. Modular shelving lets you scale in stages, converting spare rooms, shipping containers, or garage spaces into productive layers while keeping initial capital low.
Integration with lighting and trays is key: mount LED fixtures under each shelf and use shallow trays or gutters for hydroponic setups. Stability and weight rating matter—ensure racks support saturated trays plus water and equipment. Shelving reduces footprint and simplifies plant access for pruning, harvest, and pest monitoring.
Maintenance is straightforward: removable trays, accessible cable routing, and clear aisles speed cleaning and reduce contamination. Consider casters for mobility in small operations and bolt-down options for permanent installations. Proper airflow between shelves prevents microclimates that can slow growth.
Comparing Open Racks and Closed Towers
Open racks offer easy access and flexible lighting placement, while closed vertical towers maximize density and often integrate aeroponic or NFT channels. Open racks are lower-cost and simpler to service; closed towers can be more water-efficient and space-dense but need specialized plumbing and maintenance. Choose based on labor model and technical capacity.
For beginners, open racks with adjustable shelves are forgiving: easier replacement of failed lights, simpler irrigation retrofits, and straightforward pest checks. Towers can be advantageous when ceiling height is limited—stack vertically and allow continuous nutrient circulation, reducing manual watering but increasing pump dependency.
Consider load capacity, footprint, and maintenance frequency. If pursuing commercial scale, model throughput and downtime—closed systems can reduce water use and boost yields per square meter, but troubleshooting can require more skill and parts inventory.
Anúncios
Blueprint: A Simple Shelving Layout
Design a compact blueprint with 4 tiers of shelving, each 18–24 inches high, 4 feet deep and 8 feet long. Allow a 2–3 foot central aisle for access and rolling carts. Mount LED bars centered under each shelf and run a single main drain line to a reservoir. This layout fits in a 10×8 room and supports sequential planting to stagger harvests.
Wire lighting and sensors on one circuit with timer and RCD protection. Place control panel and reservoir at one end to centralize maintenance. Use stackable trays (2–3 inch depth for microgreens, 4–6 inch for lettuce) and label rows for planting schedules to optimize labor. Start with a 3×3 grid seed tray system to learn timing and germination rates.
Ensure ventilation brings supply air at low velocity along aisles and extracts above the top tier to avoid heat buildup. Position humidifier and small dehumidifier or inline fan with filter if ambient humidity varies. This simple blueprint balances initial cost, ease-of-use, and rapid learnability for newcomers.
Anúncios
Lighting Choices for Optimal Vertical Farming
LED Types and Light Spectra for Crops
LEDs are the industry standard for vertical farming because they offer spectral control, low heat output, and energy efficiency. Full-spectrum white LEDs mimic sunlight and improve worker visibility, while targeted red/blue arrays boost photosynthesis and compact growth. Choose LEDs with adjustable spectrum or a mix of white plus red supplemental bars for both growth and accurate color assessment.
Pay attention to photosynthetic photon flux density (PPFD) and daily light integral (DLI) targets per crop—leafy greens typically need 12–18 mol/m²/day, microgreens less. Measure PPFD at canopy height and adjust fixture distance: closer yields higher PPFD but increases heat and potential photoinhibition. Dimming and timers help match crop cycles and reduce energy use.
Consider fixture IP rating, mean time between failures (MTBF), and warranty. Low-quality LEDs can shift spectrum or fail early, causing uneven growth. Investing in modular fixtures that are easy to swap reduces downtime and helps maintain consistent harvest quality.
Light Placement: Strip Vs Bar Vs Panel
Strip lights and bars mounted under shelves provide uniform coverage for each tier and are ideal for shallow trays and uniform crops. Panels cover larger areas when shelf depth is greater. Bars are often easiest to retrofit on racks and allow even distribution across trays, minimizing edge shadowing and improving canopy uniformity.
Stagger fixtures to reduce hotspots and provide overlapping coverage. For narrow shelves, single central bars may suffice; deeper shelves benefit from two offset bars. Consider reflectors or white shelf bottoms to bounce light into lower canopy layers and improve photon utilization efficiency.
Mounting height affects PPFD and beam spread—install adjustable hangers or slotted rails to tweak fixture spacing as plants grow. For multi-tier setups, ensure service clearance so fixtures can be lowered for replacement without emptying racks.
Energy and Cost Optimization for Lights
Lighting is a major operating cost. Choose high-efficiency LEDs with at least 2.5 µmol/J efficacy and incorporate dimming schedules aligned with crop DLI needs. Use timers and light recipes—higher intensity during vegetative growth and lower during finishing—to reduce kWh consumption while maintaining yield goals.
Factor capital costs vs operating savings: premium LEDs cost more upfront but lower electricity bills and last longer. Pair with smart controllers and energy monitoring to track costs by fixture zone. Seek utility rebates for efficient fixtures where available to shorten payback periods.
Also consider peak demand charges—stagger light-on times across zones or shift photoperiods to off-peak hours when possible. Combine efficient HVAC and lighting controls so reduced lighting load also lowers cooling needs, improving overall facility energy performance.
Fixture Type
Best Use
Approx. Cost
LED Bar
Shallow trays, modular shelves
$$
LED Panel
Deeper shelves, larger bays
$$$
Full-Spectrum White
Visibility and mixed crops
$$$
Irrigation and Hydroponic Methods for Vertical Farming
Hydroponics Vs Aeroponics Vs Wick Systems
NFT (Nutrient Film Technique) for continuous root nutrient film.
Deep Water Culture (DWC) for fast growth in reservoirs.
Wick systems for low-maintenance microgreen setups.
Aeroponics for water efficiency and rapid root oxygenation.
Hydroponics delivers nutrients via water solutions and is common in vertical farming; NFT channels and DWC systems are reliable for leafy greens and herbs. Aeroponics suspends roots and mists nutrients, offering high oxygenation and water efficiency but requires precise nozzle and pump maintenance. Wick systems are passive, low-tech options that suit microgreens or beginner trays but don’t scale for high throughput.
Choice depends on labor, risk tolerance, and crop type: NFT and DWC are forgiving for beginners; aeroponics demands higher monitoring but can yield faster growth and water savings. Include reservoir monitoring, redundancy pumps, and easy-access plumbing in your design to reduce downtime.
Automation and Nutrient Management
Automated dosing, pH control, and EC monitoring maintain consistent nutrient conditions. Use inline pH sensors and EC probes connected to controllers to log data and trigger micro-doses of acid/base or nutrient solution. Regular calibration and scheduled checks are essential to avoid drift and nutrient lockouts that reduce yields.
Implement tiered alarms: local buzzer for immediate pump failure and remote alerts (SMS/email) for reservoir low levels or sensor faults. Automating mixing and top-off via float valves and dosing pumps reduces manual labor and keeps nutrient concentration stable across multiple racks.
Backup plans—spare pumps, valves, and a manual dosing kit—reduce recovery time after failures. Train staff in manual override procedures and keep consumables on hand to prevent crop loss from avoidable equipment delays.
Plumbing Layout and Common Pitfalls
Design plumbing to minimize dead zones and stagnation: slope drain lines toward the reservoir, use appropriate fittings, and include clean-out points. Avoid long horizontal runs where biofilm can accumulate; include inline filters and easy-to-remove strainers. Use food-safe tubing and secure fittings to prevent leaks that can cause electrical hazards or mold growth.
Common pitfalls include undersized drain lines, single-pump single-point failures, and inappropriate reservoir sizing. Oversize reservoirs slightly to buffer against nutrient swings and temperature fluctuations. Maintain regular cleaning schedules and sterilize trays between cycles to prevent pathogen carryover.
Plan service access for valves and pumps. Label lines and maintain a simple piping diagram in your control cabinet. Implement isolation valves so one rack can be serviced without draining the entire system, minimizing downtime and crop stress.
Method
Water Use
Maintenance
NFT
Low
Moderate (prevent root clog)
Wick
Moderate
Low (passive)
Aeroponics
Very Low
High (nozzle care)
Anúncios
Climate Control and Environmental Management
Temperature, Humidity, and CO2 Control
Maintaining stable temperature and relative humidity (RH) is crucial for fast, uniform growth. Leafy greens prefer 18–22°C and 50–70% RH; seedlings may need higher humidity. CO2 enrichment can accelerate growth but requires sealed rooms and monitoring—moderate CO2 boosts productivity in well-ventilated setups and can improve water-use efficiency.
Use small HVAC units or split systems sized for the sensible and latent loads of your room, accounting for heat from lights and transpiration. Pair dehumidifiers or humidifiers to maintain RH setpoints and avoid condensation on lights or walls, which can lead to disease issues.
Automate climate control with thermostats, humidistats, and CO2 controllers. Integrate alarms for out-of-range conditions and remote monitoring to act quickly if conditions drift, protecting crop quality and reducing crop failure risk.
Airflow, Filtration, and Disease Prevention
Good airflow reduces boundary-layer humidity and prevents hotspots. Use ducted supply and return with low-velocity mixing fans to move air across canopies gently. HEPA or MERV filters on intake reduce incoming spores or pests; positive-pressure rooms can help keep contamination out, but balance this against HVAC costs.
Sanitize regularly and use footbaths, sticky cards, and pest-proofing to limit insect and microbial ingress. Monitor for early signs of disease—leaf discoloration, stunted patches—and isolate affected racks quickly. Proper airflow reduces foliar disease risk and promotes even transpiration and nutrient uptake.
Zone climate controls for different crop groups to match ideal microclimates. For mixed-crop rooms, place similar demand crops together to minimize conflicting setpoints and simplify management.
Monitoring Systems and Alerts
Deploy sensors for temperature, RH, CO2, reservoir level, EC, and pH with data logging and alerting. Cloud-connected systems allow trend analysis and rapid intervention. Look for platforms that support MQTT or open APIs so you can integrate lighting, irrigation, and HVAC controls in one dashboard.
Set tiered alerts (SMS/email/push) for critical failures—power loss, pump failure, or extreme temps. Use historical logs to refine setpoints and light recipes, improving yield predictability. Regularly back up settings and store simple runbooks for emergency manual control.
Calibrate sensors per manufacturer recommendations and replace per lifetime specs. Sensor drift is a silent yield killer; regular calibration reduces crop variability and ensures reliable automation.
Crop Selection and Rapid-yield Choices for Vertical Farming
Top Fast-yield Crops for Beginners
Microgreens (radish, broccoli) — harvest in 7–14 days.
Leafy greens (lettuce, spinach) — harvest in 30–45 days.
Choose crops with short cycles and predictable growth to accelerate cash flow and learning. Microgreens are ideal for first runs due to low vertical height and simple media; leafy greens and herbs follow once you master nutrient and light recipes. Cut-and-come-again varieties let you harvest multiple yields from the same plant, improving productivity per tray.
Consider local market demand and shelf life—wash-less packaging and pre-cut mixes can increase value. For beginners, focus on a narrow crop list to refine timing, nutrient recipes, and pest management before diversifying into fruiting crops like tomatoes that need more light and larger canopy volume.
Space Optimization and Planting Density
Maximize throughput by staggering planting in shift schedules—plant a new tray every few days to create continuous harvests. Use tray layouts and cultivar spacing guides to increase seeding density without causing overcrowding. For lettuce, 18–24 plants per 10×20 tray is common; microgreens can be sown densely.
Vertical spacing matters: match shelf spacing to crop height at harvest rather than mature height to pack more tiers. Use cut-and-come-again to harvest leaves without replanting, increasing yield per square foot. Employ germination and seedling zones with higher humidity to conserve shelf space in the main production area.
Label planting dates and maintain simple kanban or calendar systems for rotation. Space optimization also includes airflow paths and worker ergonomics—avoid overpacking that complicates harvesting and maintenance, leading to higher labor costs and crop damage.
Succession Planting and Harvest Scheduling
Create harvest calendars using days-to-harvest and staggered plantings so customers receive steady supply. For example, with 7-day microgreen cycles, plant one tray daily across seven shelves to have a daily harvest. For lettuce with 35-day cycles, plant every 5 days across racks to maintain weekly yields.
Use numeric schedules, track germination rates, and maintain spare capacity to cover failed batches. Keep records of seed lot performance, as seed vigor affects timing and yield. Succession planting reduces risk from single-run failures and smooths cash flow by aligning harvests with demand windows.
Train staff on harvest windows to avoid over- or under-mature picks. Consistent harvesting times and gentle handling increase shelf life and marketability while making planning and distribution predictable.
Starter Equipment Checklist and Risk-reduction Tips
Essential Starter Kit for Newcomers
Modular 4-tier shelving unit with adjustable shelves.
LED bars (dimmable) sized to shelf width.
Reservoir, submersible pump, and basic plumbing kit.
pH and EC meters with calibration solutions.
Inline fans/filters and basic HVAC controls.
Begin with a compact, serviceable starter kit to limit upfront cost and complexity. Prioritize durable shelving, reliable pumps, and quality sensors—these reduce downtime and help you learn system behavior. Avoid buying extra-specialized equipment until you understand throughput and labor requirements.
Include spare parts: pump, tubing, fittings, and light drivers. Early losses are often due to equipment failures rather than agronomy mistakes—having spares and simple wiring diagrams shortens recovery times and preserves crop integrity.
Safety, Hygiene, and Compliance
Implement food-safety practices: handwashing stations, PPE for workers, scheduled cleaning, and traceability logs for each tray. Use food-grade materials for any water-contact surfaces and document chemical storage and usage. Compliance with local health codes and food handling regulations is essential—consult local extension services or authority sites for specifics.
Address electrical safety: separate water and power runs, use GFCIs/RCDs, and mount control panels above splash height. Train staff on lockout/tagout for electrical and pump maintenance. Regularly check wire routing and strain reliefs to prevent accidents.
Record SOPs for sanitation, seed handling, and harvesting. Good documentation reduces operational variability and supports consistent product quality as you scale or train new staff.
Start small, validate your light recipes and nutrient mixes, then scale. Keep nursery capacity to recover failed batches and stagger expansions to match market demand. Financial modeling should include energy, labor, seed cost, and packaging to estimate break-even and payback timelines realistically.
Use redundancy for critical systems—dual pumps or backup power for short outages. Monitor KPIs: grams per kWh, yield per tray, and labor hours per harvest to identify bottlenecks. Outsource non-core tasks like packaging or distribution until operations stabilize.
Plan for pest outbreaks with rapid isolation procedures, spare trays, and contingency planting. Build supplier relationships for seeds and parts to reduce lead times. Measured, incremental scaling minimizes capital risk and keeps operations manageable.
Vertical farming provides a high-yield, resource-efficient pathway to local production when you pair the right rack, lighting, irrigation, and climate strategies. Start with a modest shelving blueprint, fast-yielding crops, and a focused starter kit to reduce risk and speed time-to-harvest. Track metrics, keep spares, and iterate on your lighting and nutrient recipes as you learn.
Ready to start? Sketch your first shelf layout, pick three crops (microgreens, lettuce, basil), and order the essential kit. Vertical farming is accessible—take the first rack, plant your first tray, and refine from harvest to harvest.
Frequently Asked Questions
What Initial Space and Layout Do I Need to Begin Vertical Farming?
Begin in as little as a 10×8 foot room with a 4-tier shelving layout: allow a 2–3 foot aisle, mount LED bars under each shelf, and position a small reservoir and pump at one end. This footprint supports sequential planting, easy access for maintenance, and manageable HVAC loads, letting you learn nutrient and light recipes before scaling to bigger rooms or containers.
Which Crops Give the Fastest Return on Investment in Vertical Farming?
Microgreens, certain herbs (basil), and baby leafy greens offer the quickest returns because of short cycles (7–45 days) and high market value per square foot. Microgreens are particularly forgiving—low height, minimal infrastructure, and rapid harvest—making them ideal for cash flow while you optimize systems for larger crops and continuous production.
How Do I Choose Between Hydroponics, Aeroponics, or Wick Systems?
Choose based on technical capacity and goals: wick systems are low-tech and good for microgreens; hydroponic methods (NFT, DWC) are reliable for leafy greens and easier to maintain; aeroponics yields high efficiency but requires precision maintenance. Start with a forgiving hydroponic system and move to aeroponics once you have experience and redundancy in place.
What Are the Common Failure Points and How Can I Mitigate Them?
Common failures include pump or sensor faults, lighting outages, and climate excursions. Mitigate risk with redundant pumps, spare fixtures, remote alerts, and SOPs for manual overrides. Keep spare parts, calibrate sensors regularly, and use simple automation with clear alarm thresholds so you can address issues before crops are lost.
How Much Does Energy Cost Typically Impact Profitability?
Energy is a major operating expense—lighting and HVAC are the largest contributors. Efficiency measures (high-efficacy LEDs, timed dimming, energy-efficient HVAC, CO2 management) and utility rebates reduce costs. Track kWh per kg produced and optimize DLI and climate setpoints; many small farms can become profitable by controlling energy intensity and improving labor efficiency.
Meta Description (reference): A practical beginners guide to vertical farming that compares shelving, lighting, irrigation, and climate control to speed time-to-harvest and reduce risk.
Edvânia Almeida. Formada em Ciências Contábeis e Pós-graduada em Gestão Financeira: Auditoria e Controladoria pela FGV. Pequena pecuarista e apaixonada pelo Agronegócio e Gestão Estratégica.
Para fornecer as melhores experiências, usamos tecnologias como cookies para armazenar e/ou acessar informações do dispositivo. O consentimento para essas tecnologias nos permitirá processar dados como comportamento de navegação ou IDs exclusivos neste site. Não consentir ou retirar o consentimento pode afetar negativamente certos recursos e funções.
Funcional
Sempre ativo
O armazenamento ou acesso técnico é estritamente necessário para a finalidade legítima de permitir a utilização de um serviço específico explicitamente solicitado pelo assinante ou utilizador, ou com a finalidade exclusiva de efetuar a transmissão de uma comunicação através de uma rede de comunicações eletrónicas.
Preferências
O armazenamento ou acesso técnico é necessário para o propósito legítimo de armazenar preferências que não são solicitadas pelo assinante ou usuário.
Estatísticas
O armazenamento ou acesso técnico que é usado exclusivamente para fins estatísticos.O armazenamento técnico ou acesso que é usado exclusivamente para fins estatísticos anônimos. Sem uma intimação, conformidade voluntária por parte de seu provedor de serviços de Internet ou registros adicionais de terceiros, as informações armazenadas ou recuperadas apenas para esse fim geralmente não podem ser usadas para identificá-lo.
Marketing
O armazenamento ou acesso técnico é necessário para criar perfis de usuário para enviar publicidade ou para rastrear o usuário em um site ou em vários sites para fins de marketing semelhantes.
 Ir para o conteúdo